Install KTH-Print on a MAC computer
By using this quick reference guide, you can install KTH-Print on your own Mac computer.
-
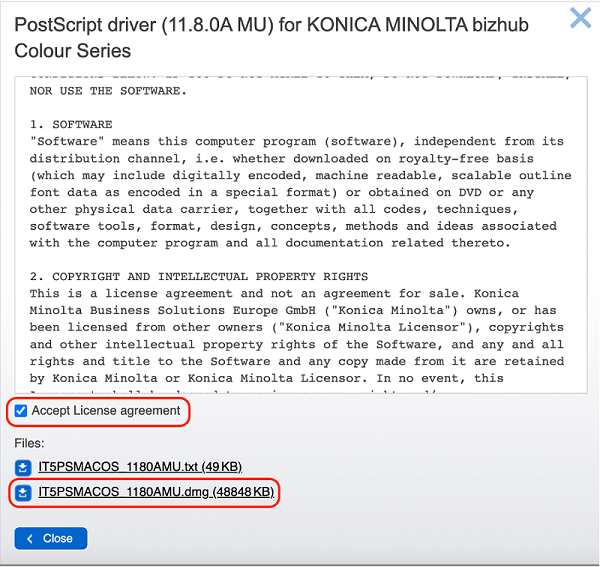
First, you have to download a Konica Minolta Postscript driver for c658 printer, for your operating system that you are using, which you will find under the heading "Drivers" on the following page, Konica Minolta:s webpage (www.konicaminolta.eu).
To see the OS version on your macOS computer: Click on the Apple at the top left of the screen and About this Mac. - Click "Download", accept the license agreement and click on the file ending in .dmg.

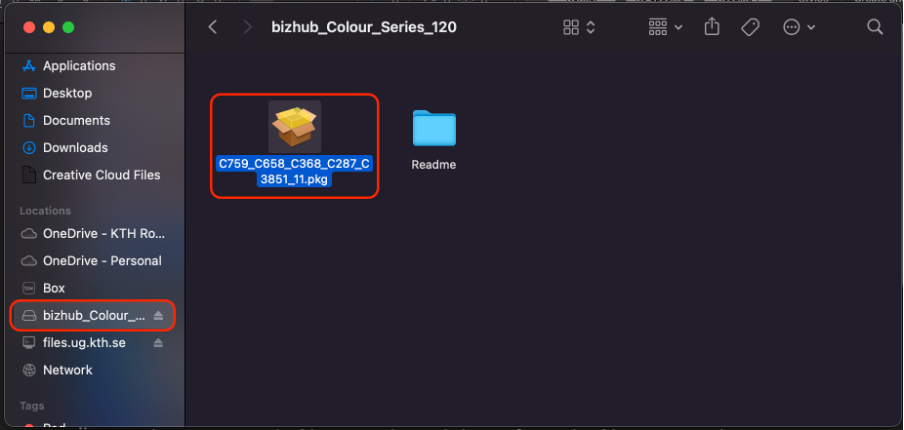
- After the .dmg file is downloaded, open it, which will mount it in the Finder.
- Open the mounted file in Finder and run the .pkg file. This will install the drivers on the computer.

- Follow the instructions for installing the Drivers.
- Go to System Preferences and choose “Printers and Scanners” or “Print & Scan”.

- Click the “+ button” to add a printer
- In order to be able to install KTH-Print we have to get access to that option in the Mac interface.
Right-click (or press the CTRL key while clicking) the “Default” icon (or any other icon on the toolbar), then select “Customize Toolbar” from the menu.
- Drag the “Advanced” icon to the toolbar and then click on “Done”.

- Click the “Advanced” icon that was added to the toolbar.

- Choose “LPD/LPR Host or Printer” from the Type pop-up menu.

- In the URL field, type the printer's queue address, in this example lpd://username@kth-print3.ug.kth.se.
Change the “username” to your username (without @kth.se or @ug.kth.se)
Under “Name” you can write any fitting name and under “USE” choose “select software”. - Here you select “Konica minolta bizhub c658” and then click on “OK”.

- In the next dialogue, check the “Duplex Printing Unit” so you can print double-sided.

- Now the installation is done.
